
Please note: The above image illustrates the SnapClip III. The steps remain the same for the SnapClip II; however, there will only be two locks on the clip.
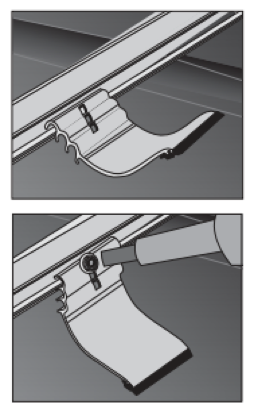
Snap the SnapClip onto your ColorGard crossmember after installation. One or two clips are used between seams. Mount the SnapClip to the back of the crossmember using the lock that results with the rubber “foot” resting properly on the panel surface. When applying downward pressure on the part, the “toe” should engage the surface of the panel just before the “heel.” Screw SnapClip into place utilizing the provided stainless steel self-tapping screw.
Please reach out to support@s-5.com for assistance.